The Settings tool allows you to assign specific lights (by model) to cells in the SELECT grid, and to set or “patch” the lights’ to their required DMX start address. In order to patch a fixture, you must know the manufacturer, the model, the light’s current operating mode (often called its footprint) and its DMX start address. Generally, every light is given a unique start address.
Most color-changing-only lights will match one of the Generic profiles. Lights with position or shape attributes require specific profiles. If a light doesn’t appear in the Light Type, or a required operating mode is missing, email a pdf of the light’s manual to fixtures@pathwayconnect.com to request inclusion in the fixture library.
"All" ![]() fixture types available in the current fixture library are shown,
organized by manufacturer name. You can use
the arrows
fixture types available in the current fixture library are shown,
organized by manufacturer name. You can use
the arrows ![]()
![]() or touch the space between the arrows to jump through the
list quickly.
or touch the space between the arrows to jump through the
list quickly.
Press
the star![]() to
dispaly a limited selection of fixtures, as chosen by the user. Once
a light is selected, it may be added to the "Favorites" list
for easy reuse by touching Add Favorite
to
dispaly a limited selection of fixtures, as chosen by the user. Once
a light is selected, it may be added to the "Favorites" list
for easy reuse by touching Add Favorite ![]() . Any light
that is selected this is already in the favorite list shows Remove Favorite
. Any light
that is selected this is already in the favorite list shows Remove Favorite ![]() .
.
A grid of DMX start addresses is shown, in blocks of 32 DMX slots. The DMX slot number is shown in the top left hand corner of each cell.

The larger number in the middle of each cell is the Light's number. At
the bottom of the cell is the attribute controlled by that slot, such
as intensity, color, pan, gobo, etc. Use the
red ![]() and green
and green ![]() wheels or the arrows
wheels or the arrows ![]()
![]() to scroll through
the grid. To patch a light to a specific DMX slot (or range of slots for
multi-attribute lights), touch the cell with the ‘starting’ DMX address
number.
to scroll through
the grid. To patch a light to a specific DMX slot (or range of slots for
multi-attribute lights), touch the cell with the ‘starting’ DMX address
number.
A single ‘light’ in the SELECT grid may be patched to include control
of the light’s dimmer and the light’s accessories – for example a dimmer
and a scroller, or a dimmer and a moving mirror. That means the light
has two DMX start addresses. First select the desired accessory
combination from Light Type![]() i.e. 2 Color
Scroller, Gobo Rotator or I-Cue Mirror. Then, in DMX Addr
i.e. 2 Color
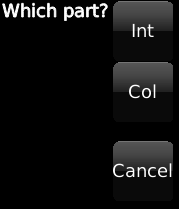
Scroller, Gobo Rotator or I-Cue Mirror. Then, in DMX Addr ![]() touch an empty cell. You will be asked:
touch an empty cell. You will be asked:

Choose the correct part, then touch another cell specifying the other part(s) as needed.
Some lights support more than one intensity attribute. These
lights will appear in Light Type ![]() as ‘Part 1’, ‘Part 2’, and so on, or as ‘Head 1’,
‘Head 2’ etc. In most cases, each part should be patched to
consecutive, contiguous blocks of DMX slots. In some cases,
when Intensity is controlled through a dimmer, the INT channel may be
separated from the attribute channels.
as ‘Part 1’, ‘Part 2’, and so on, or as ‘Head 1’,
‘Head 2’ etc. In most cases, each part should be patched to
consecutive, contiguous blocks of DMX slots. In some cases,
when Intensity is controlled through a dimmer, the INT channel may be
separated from the attribute channels.
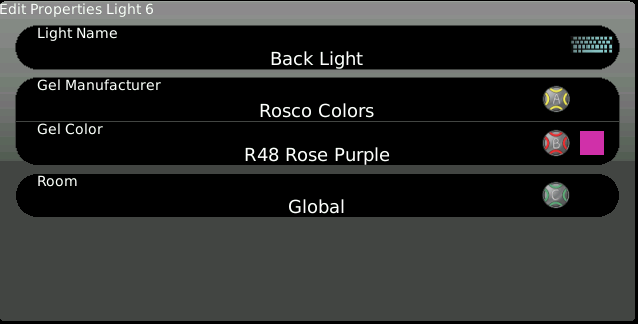
Allows you to give your light a Name which will be seen in the SELECT grid. By default, a light’s name is its fixture type. Also allows you to specify what gel color is being used by a specific light. This feature is typically used with dimmers.

If you have added Rooms to your show file in SETUP | ROOMS, you can specify which Room the light is in. By default, lights are not assigned a room and appear "Globally". Putting lights in Rooms allows you to limit the number of lights you see in Select when you apply a Filter.
![]() NOTE
NOTE